So I was one weekend in Portland speaking at the WordCamp Portland ME about creating Gutenberg blocks. It’s a fancy new visual drag and drop editor for the website content management system software called WordPress.
I was staying at the Hyatt place and one morning I just woke up at 6:00 and decided to go out and shoot. It was cold, as expected from Maine, not to much though, only 37° F, roughly 3° C. However, it was fine with the proper clothing so I went outside.
It was cloudy and rainy for the past two days but this morning was quite clear and really beautiful. I went to the docks first to catch the first sun rays falling on them.
After walking around for a while I started coming back and looking at the contrast of sun and shadows and the building types, I decided to try this film simulation I made to replicate a bleach bypass feel. I previously wrote a post about how to achieve bleach bypass in Affinity Photo.
Film simulations for Fujifilm cameras allow them to output a final jpeg photo that will have certain adjustments applied to it, like deeper shadows or more intense colors. You can preview these simulation when shooting, so you’ll see in the camera the photo as it would be processed by the film simulation. This particular one starts with the fantastic Classic Chrome simulation to take advantage of its contrast and soft colors.
Bleach bypass is a technique from traditional film industry, characterized by hard contrast and low saturation. One movie that uses bleach bypass extensively is Saving Private Ryan. The desaturated colors and dramatic tones sit well with the mood of the movie.
The recipe for this Fujifilm simulation is as follows:
- Film: Classic Chrome
- Highlights: +1
- Shadows: +4
- Color: -4
- Noise reduction: -2. We want to retain the noise, it’s our digital grain after all
- Sharpness: 0

These settings can be applied accessing the Quick Menu, pressing the Q button in the back of the camera. Once you’re done, save them so you can reuse them later.
Here’s some photos made with this film simulation, all shot with XF 18-55 lens.


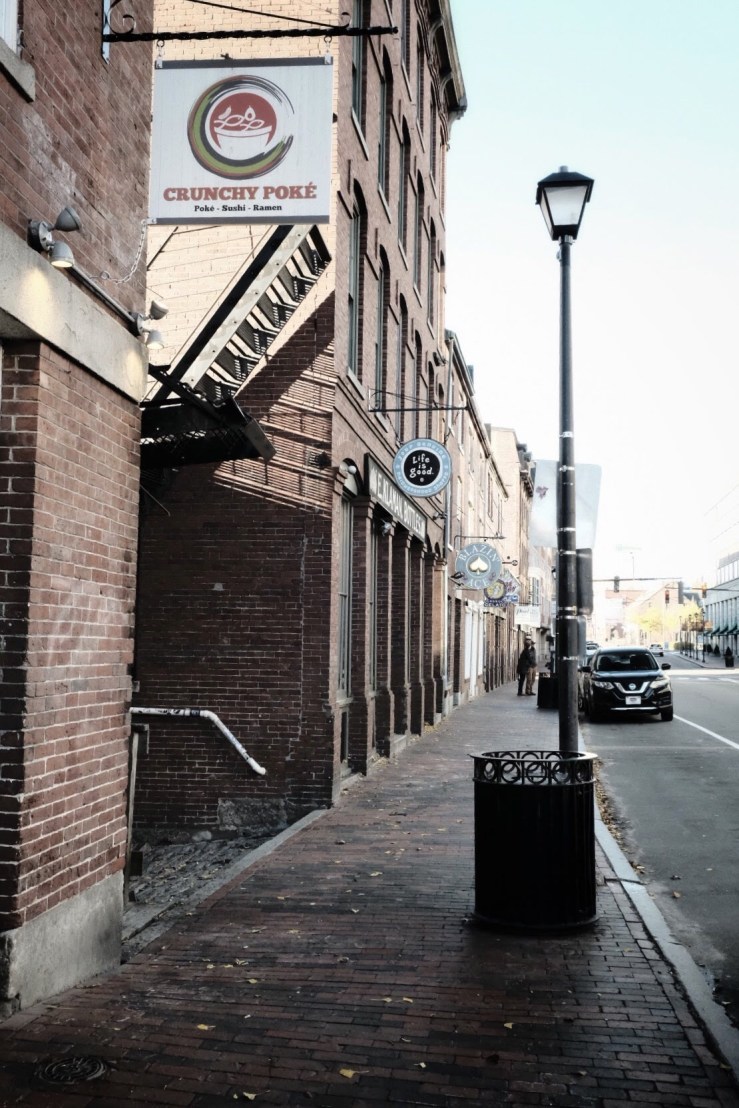
I like that all the images look like they belong to the same family. One adjustment I’d like to make but it’s not possible (at least in camera) is to lower the saturation even more in some scenes. The soft golden light of the sun was really bringing the red colors of the bricks up, so in that situation, I would’ve wanted to decrease saturation a bit more.
One thing I found is that areas in the shade look really well with this bleach bypass simulation so I’m definitely looking forward to try it in a cloudy day.
That simulation looks pretty nice. A cup of coffee well deserved.
Thank you very much Tero!! If you post photos using this image simulation to Twitter or Instagram, ping me at @eliorivero on both platforms and I’ll retweet or share a story of your photo!
You got me started to define the Colourest setting to enhance my experimental work.
Thanks
Great job Elio! Love that you share settings for this one! That’s what Fujifilm community is all about! Cheers
Thanks Ludvig! It’s only fair to give something back. We all learn from this community and make it better!
Wonderful work. I love Portland ME, and the captures you have here are wonderful. Excited to try out your tweaks on Classic Chrome, makes it a whole new look. Cheers (+ tipped you – if you’re reading this and like the simulation settings, you should too! Let’s me put off getting the XT4 a little bit longer!)
Thank you very much! Always happy to meet another Portland ME lover!
[…] if you’re also interested in a Bleach Bypass film simulation for your Fujifilm X-T2 like the new one in the X-T4, check this blog post where I shared a recipe to add to your […]
[…] Quelle: elio.blog […]